An in-depth guide into starting StreamSets, deploying engines, and running pipelines.
Overall architecture recap
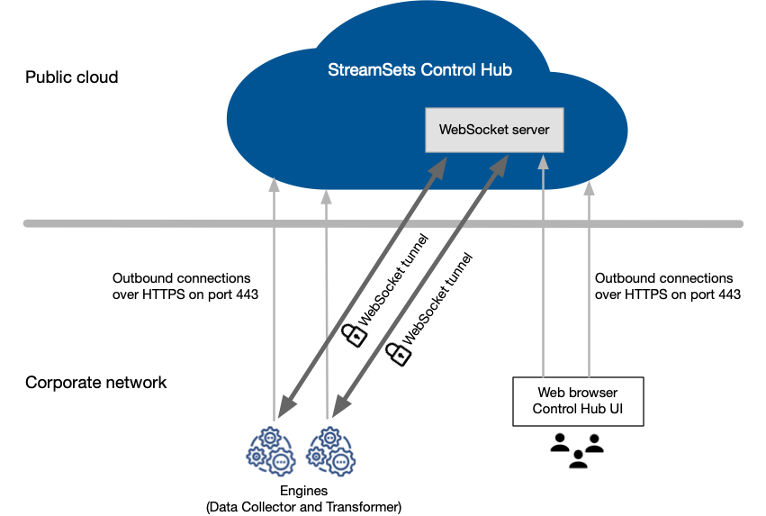
The control plane of StreamSets Platform, Control Hub, hosted in the cloud. The data plane encompasses StreamSets Data Collectors (SDCs), which should be installed in a customer’s network, be it in the cloud or on-premise.
Consider these options for SDC installation (not all of them are recommended for production scenario):
| Tarball (binary download) | Docker container | |
| Windows PC | not supported | OK – the fastest to implement |
| Linux/Mac | OK with configured prerequisites |
Depending on your choice, find below instructions for major steps of tarball and Docker options.
Provide and prepare your machine
Use your own laptop or create a VM in the cloud of your choice. VM size should be determined by the minimum requirements for SDC installation: 2 vCores, 1GB RAM, 6GB disk space.
If on Linux, run a system update command, like yum update or apt-get update.
If your machine requires an HTTP proxy to access the Internet, make note of the proxy details, you will need them.
Docker option
Instal Docker Desktop on your Mac or Windows – https://docs.docker.com/desktop/
Or install on Install Docker Engine on a Linux VM – https://docs.docker.com/engine/install/
Tarball option
- If not already installed, install Java 8, 11 or 17. Installation details differ between Linux versions, not mentioning MacOS, and it would be impractical to copy them here.
- Configure the Open File Limit.
In Linux, it means adding a line like the following to the file /etc/security/limits.conf (you need local admin rights for that):
* - nofile 32768
(you will need to log off and log on for the change to have effect)
In MacOS, the process has few more steps and is best covered by this link: https://docs.streamsets.com/portal/platform-datacollector/latest/datacollector/UserGuide/Installation/Requirements.html#concept_al3_qz5_jz
Configure a Streamsets Platform Tenant
Sign-up for StreamSets Free Trial
On any computer (it doesn’t have to be the machine for SDC installation), proceed to https://cloud.login.streamsets.com/signup and complete sign-up.
Confirm your registration via the link sent to you by email, then log on to the Platform. On your first logon you will need to specify:
- the region of the Platform instance: there are instances in North America, Europe and AsiaPacific, but only the former two available for Free Trial;
- Your Company name (you can change it later if needed);
- Agree to Terms and Conditions.
Create a new Deployment
Menu Set Up -> Deployments -> Click on “Create a deployment” link.
Enter the new Deployment’s name.
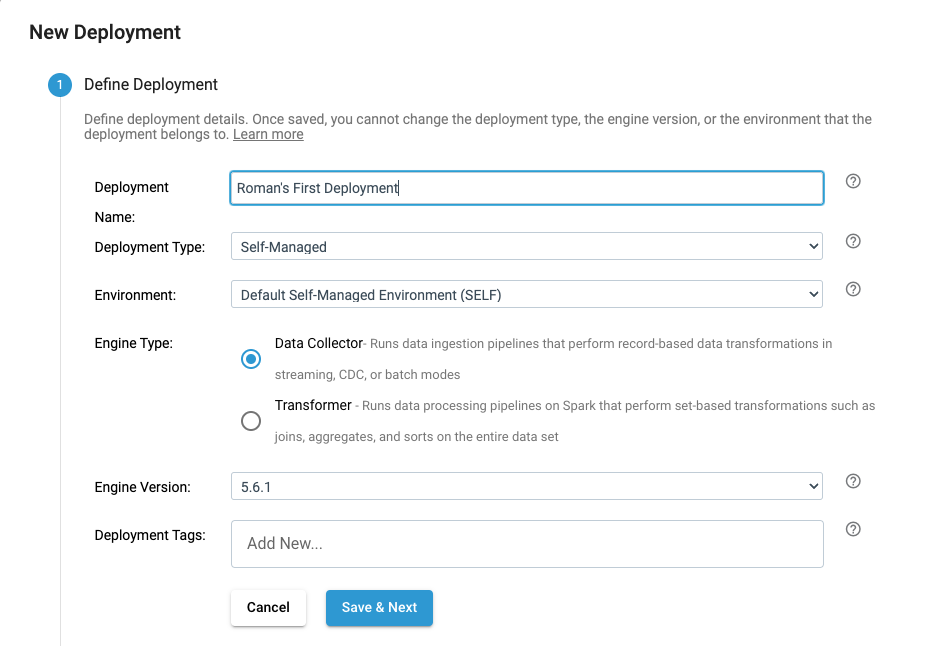
Leave everything else default, for example, engine version may be higher than in the screenshot. Click Save & Next.
The Configure Deployment screen requires two actions: add required libraries, and configure proxy settings (this bit can be skipped if no proxy is used).
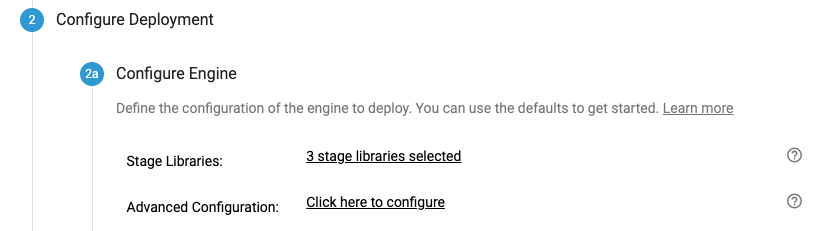
To add libraries, click on the link next to Stage Libraries. Then search for JDBC (it will be required when building a pipeline) and click the big “+” on any stage in the resulting list – all of them use the same library:
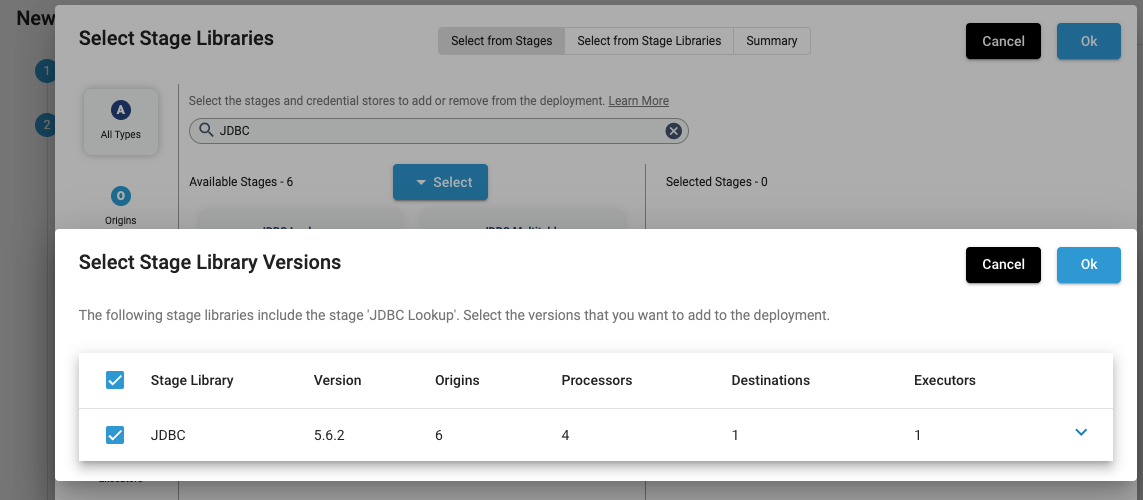
Click Ok to add this library, then click Ok to exit to the deployment wizard. If your SDC is not behind a proxy, just leave everything else default and click Save & Next again.
If your SDC is behind a proxy, click the link next to Advanced Configuration and go to the Proxy tab like in the screenshots below.
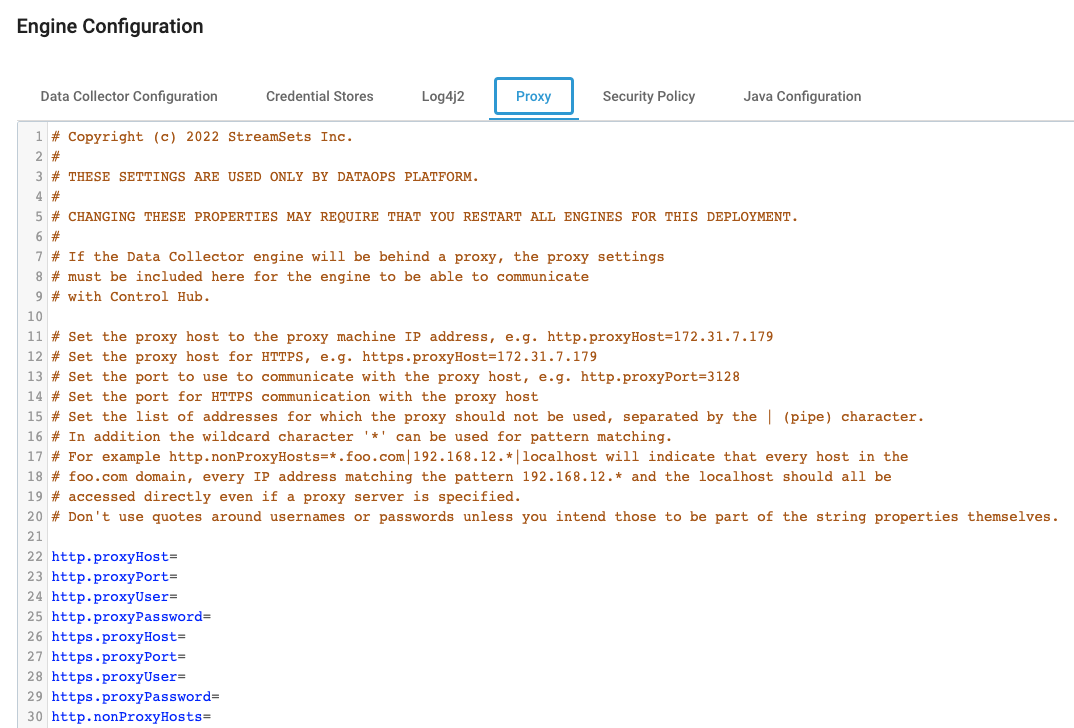
Fill in the required details for accessing your proxy.
In the next screen, select your Install Type for your data collector engine. Click Start & Next for the next screen, then click Start & Generate Install Script on the final one. Copy the install script into your clipboard.
Install Data Collector
Docker option
The generated script is just a command to run a Docker container:
docker run -d -e http_proxy= -e https_proxy= -e STREAMSETS_DEPLOYMENT_SCH_URL=https://eu01.hub.streamsets.com -e STREAMSETS_DEPLOYMENT_ID=<some random string> -e STREAMSETS_DEPLOYMENT_TOKEN=<really long random string> -e ENGINE_SHUTDOWN_TIMEOUT=10 streamsets/datacollector:5.6.1
You may make some changes to this command, for example:
– add “sudo” in the beginning, unless the Docker engine is configured to work with non-root accounts;
– container name, e.g. “--name sdc561”;
– volume mapping, if local file system is going to be used.
Run this command in the terminal/command window on your VM or laptop.
Tarball option
The generated script will look like this (but if you had configured a proxy the script will include all those details):
http_proxy= https_proxy= bash -c 'set -eo pipefail; curl -fsS https://eu01.hub.streamsets.com/streamsets-engine-install.sh | bash -s -- --deployment-id="<some random string>" --deployment-token="<really long random string>" --sch-url="https://eu01.hub.streamsets.com" --engine-shutdown-timeout="10" --foreground '
Run this command in the terminal window for your VM or Mac. The easiest/fastest (and not production-recommended) option is to run this script as your own regular user and accept all defaults that the script suggests.
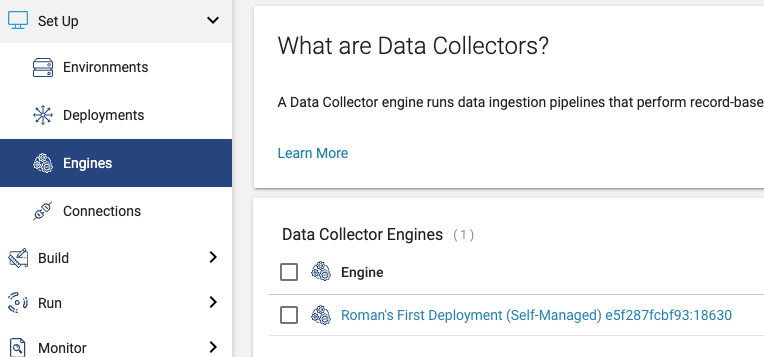
Verify Data Collector availability
At the end of either Docker or Tarball install, you should have your SDC application running. 1-2 minutes after the SDC starts up, you should also be able to see it in the list of Engines in the Platform UI:
Develop your first pipelines
The use case covered below is scraping semi-structured data from the Web to a relational storage.
To follow the “datalake zones” approach, we will scrape semi-structured data into the raw “zone”, and then process it to extract select information.
In the Platform UI, open menu Build -> Pipelines.
Click on Create Pipeline link.

Maintain the pipeline’s Name, then click Next.
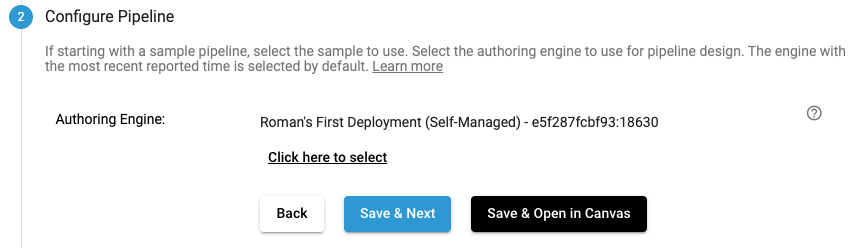
Select the SDC you’ve just installed as your Authoring Engine, and click Save & Open in Canvas.
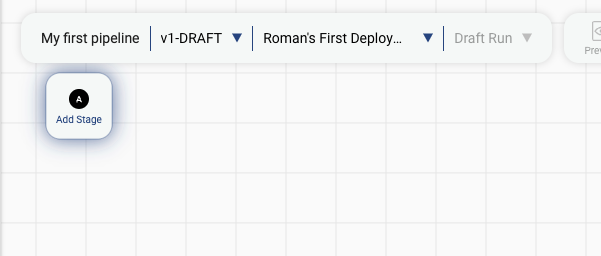
In the canvas, click on Add Stage and find HTTP Client origin (you can use search). The origin’s configuration will open automatically.
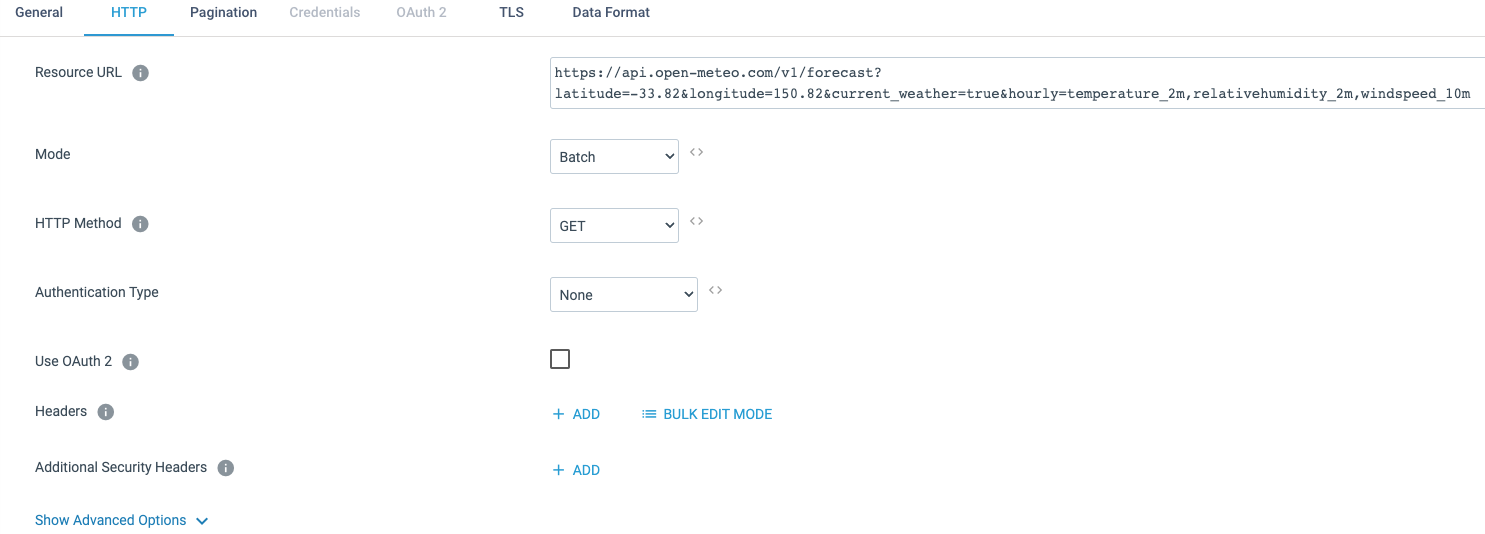
Maintain configuration:
- Resource URL – this example is using free weather data from Open Meteo (the coordinates are of Sydney, Australia, but feel free to use your location): https://api.open-meteo.com/v1/forecast?latitude=-33.82&longitude=150.82¤t_weather=true&hourly=temperature_2m,relativehumidity_2m,windspeed_10m
- Mode (Batch).
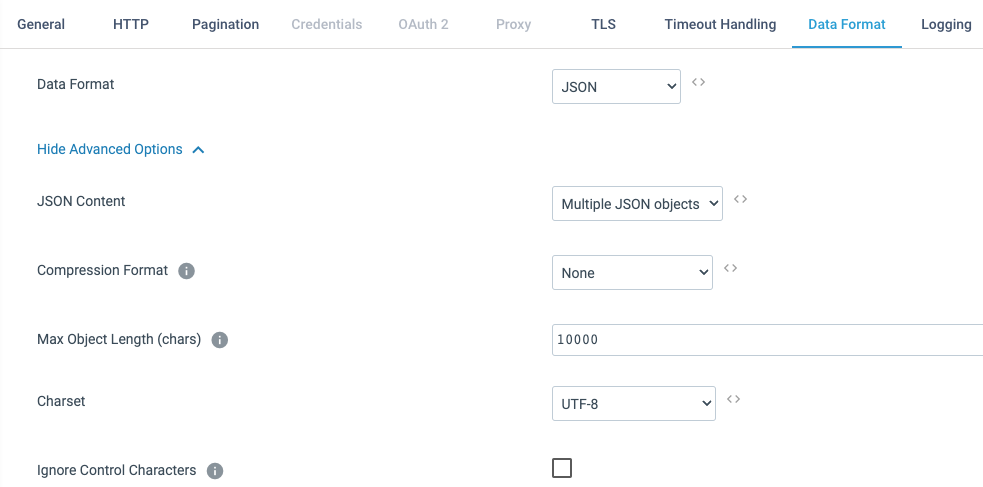
Set the expected incoming Data Format to JSON format, and Max Object Length (max size of a single record) to 10000 characters:
Click on Add Stage and select Local FS destination. Set the target location to /tmp/raw_weather:
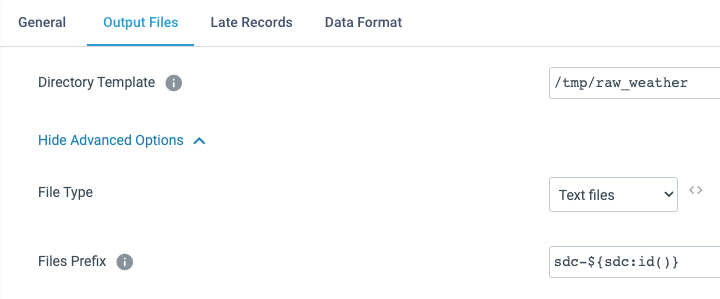
… and specify the output Data Format (choose JSON).
Execute the pipeline, it should finish within a minute, processing 1 record and generating a file in /tmp/raw_weather directory (if your SDC runs in a Docker container, the file will be created in that container, too).
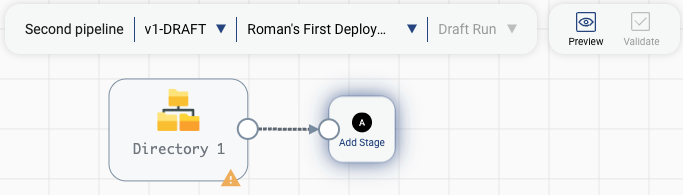
Create a second pipeline, and use Directory origin, use /tmp/raw_weather in Files Directory configuration setting, * as files pattern, and Last Modified Timestamp for Read Order.
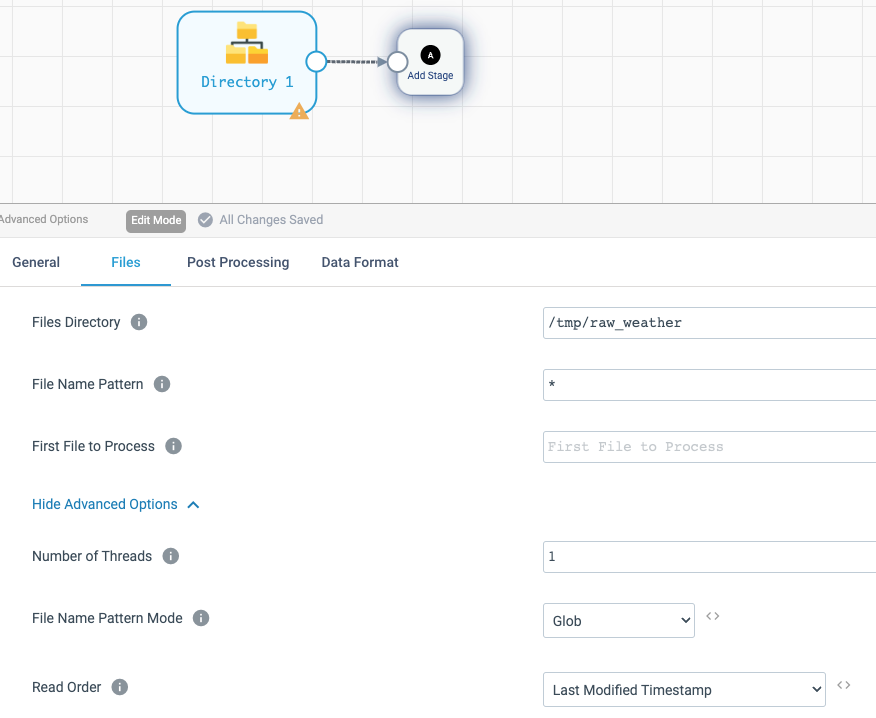
Set Data Format for JSON again, and set max record size to 10000.
Let’s have a look at the data. Click on Preview button in the toolbar, ans select Run Preview action:
After a few seconds, you will see data preview in the lower half of the screen. The data is nested:
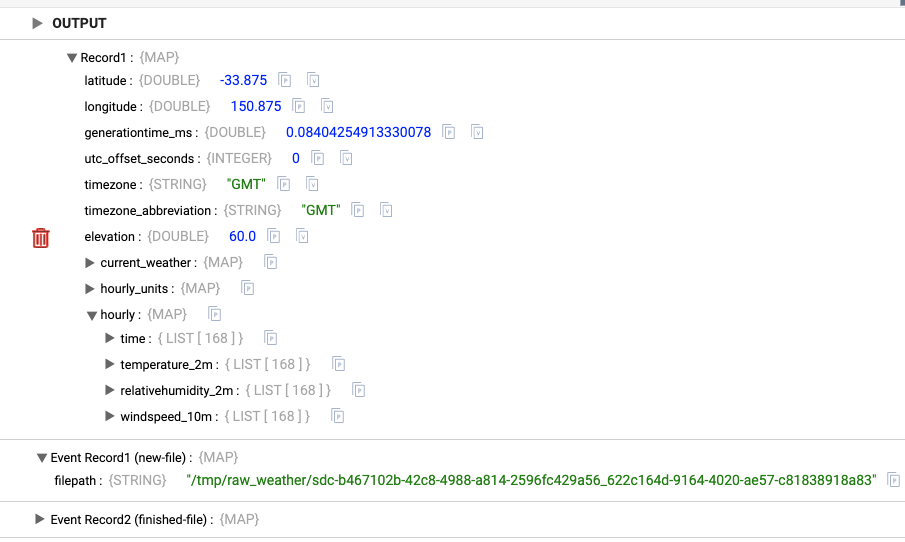
Expand the hourly node. It contains several lists – columns of values, where the first values from each list would form the first record, etc. If only there was a way to zip those values together..
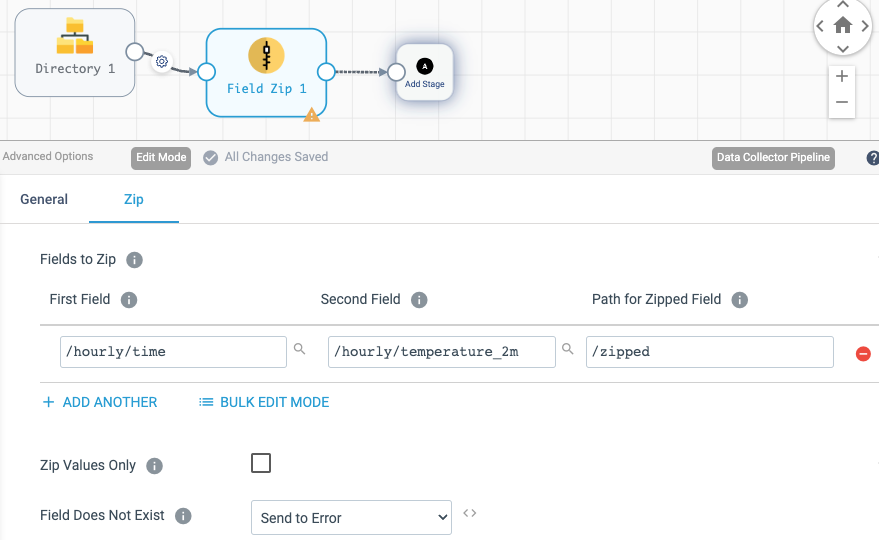
Add a new stage Field Zip, specify /hourly/time as the first field to zip, and /hourly/temperature_2m as the second field, set the zipped field to /zipped:
You may want to run Preview again to check how resulting data looks. To zip in more fields, you need to chain more Field Zip processors, but at the moment let’s just proceed with only two.
As we don’t need the /hourly field anymore, let’s drop it using Field Remover stage. Getting rid of unneeded fields early helps to keep the memory footprint of the pipeline low.

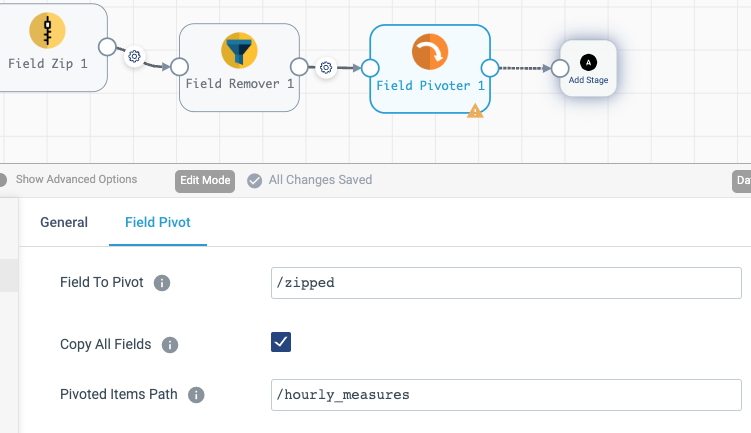
The zipped list of values still resides in a single record. In a relational database model, each measurement should be a separate record – This is achieved with the Field Pivoter processor. The field to pivot is /zipped, and let’s put the pivoted result to /hourly_measures.
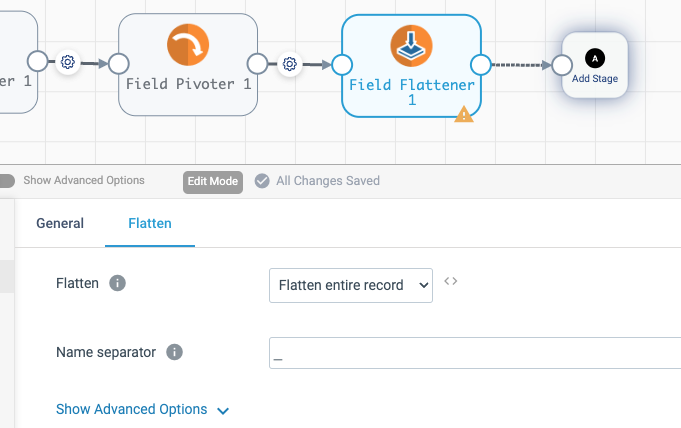
The last thing to do is convert nested fields to flat records suitable for loading into a relational database. Add Field Flattener processor and configure it to flatten the entire record. To simplify further processing, use underscore as the name separator, instead of the default dot.
At this stage, the data is already suitable for relational database load. One extra step that might be required is renaming fields with Field Renamer to match the target schema.
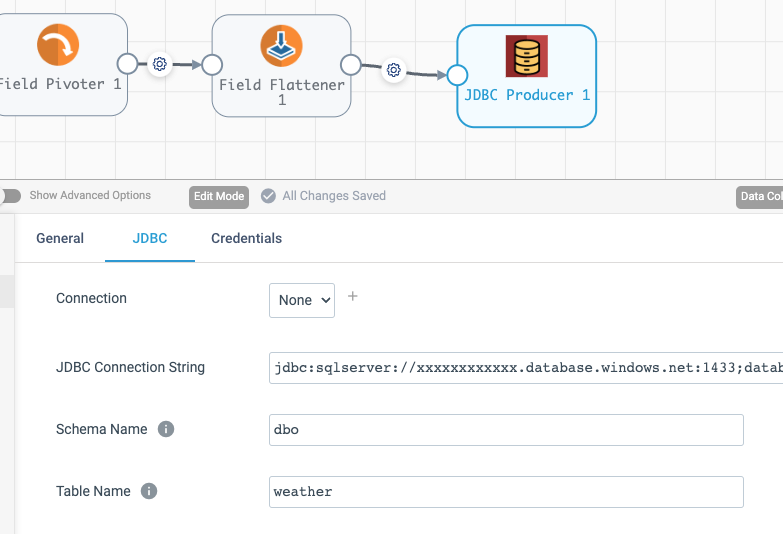
Finish your pipeline with a destination stage of your choice, e.g. Local FS to output flattened data to a directory on SDC machine – by now, you should be able to configure it without much guidance. Alternatively, to output to a SQL database, use JDBC Producer – the example below demonstrates how to configure it for Azure SQL Database.
That’s it, your pipeline to process scraped nested data is ready. Before running it, make sure to create the target table in the database:
create table dbo.weather (
latitude real not null,
longitude real not null,
generationtime_ms real null,
utc_offset_seconds int null,
timezone nvarchar(3),
timezone_abbreviation nvarchar(3),
elevation real null,
current_weather_temperature real not null,
current_weather_windspeed real not null,
current_weather_winddirection real not null,
current_weather_weathercode int null,
current_weather_is_day int null,
current_weather_time nvarchar(16) null,
hourly_units_time nvarchar(10) null,
hourly_units_temperature_2m nvarchar(3) null,
hourly_units_relativehumidity_2m nvarchar(3) null,
hourly_units_windspeed_10m nvarchar(6) null,
hourly_measures_time nvarchar(16) not null,
hourly_measures_temperature_2m real not null
);
Start the pipeline, and wait until it reports 168 processed records and pauses. Actually, it’s not a pause, the pipeline is listening for new files to arrive, and you can test it by running the first (data scraping) pipeline in a new browser window and then returning to this one: from 168 processed records, the number will change to 336. You can manually stop the pipeline by clicking the Stop button.
Conclusion And Next Steps
Congratulations, you have created a new StreamSets Platform tenant, installed a Data Collector engine and used it to extract, transform and load weather data! If nothing unexpected happened, you should have done all this in less than an hour.
There are a couple of things here to reflect about.
This ETL process can be executed as a batch. For this, you need to create a Job for each pipeline, and then create an orchestration pipeline running transformation/load after extraction. To make the second pipeline stop after all available data is processed, a Pipeline Finisher would be required. This might be a good option if the source is updated infrequently, or subsequent analytics does not require most recent data.
Alternatively, this process could be used for more modern, continuous data delivery with decoupled architecture. In the first pipeline, use Polling mode of HTTP Client origin, to make it scrape data at regular intervals. Create and start Jobs for both pipelines – they are not tightly coupled, but the second pipeline would process a new file every time after the first one creates it. Meanwhile, the storage in the middle doesn’t have to be file-based: these pipelines can be easily changed to use a queueing application like Kafka or Amazon Kinesis
Here some more ideas to explore, in no special order:
- Platform management features, like version control or Python SDK,
- other data sources and destinations, like databases (batch and change data capture) or cloud storage/services,
- if Snowflake is the central data storage of choice, build enterprise data warehouse using pipeline created in Transformer for Snowflake.